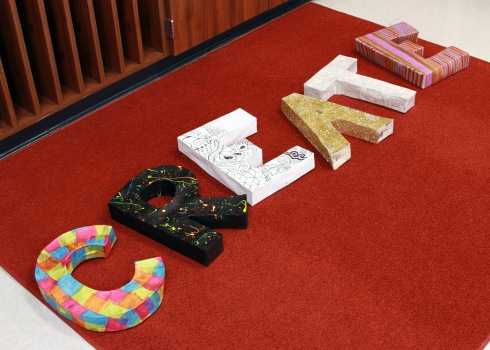
Or, if you want to be fancy pantsy about it, Papier-mâché. I decided to make some 3D letters for my classroom this summer after seeing Mrs. Nights Artroom posted on Pinterest.
I went shopping first trying to find letters that I could buy and then just decorate, but after looking around and letters that were big enough for what I needed were out of my price range, so I decided to make them myself. The process was easy and cost me under $10!

I started off by drawing each letter nice and big on poster board. I then cut each one out and traced it on another piece of poster board and cut that one out to make the front and the back of each letter. With the extra poster board I cut two inch strips that I then taped between the front and the back of each letter. (To spell Create, I used 4 pieces of poster board)

I then made the paper mache with by mixing flour and warm water until I had a liquid that coated my finger, but was still translucent, so not too thick. From there I just covered each letter in paper macho and newspaper strips and then let them dry in the sun, flipping over occasionally.

From there the rest is up to you! I decided to decorate each one differently for my art room.

I used Mod Podge to cover one letter in tissue paper squares.

I splatter painted another.

I doodled with a Sharpie on this one after painting it white. (I hadn’t quite finished drawing on it yet in this photo)

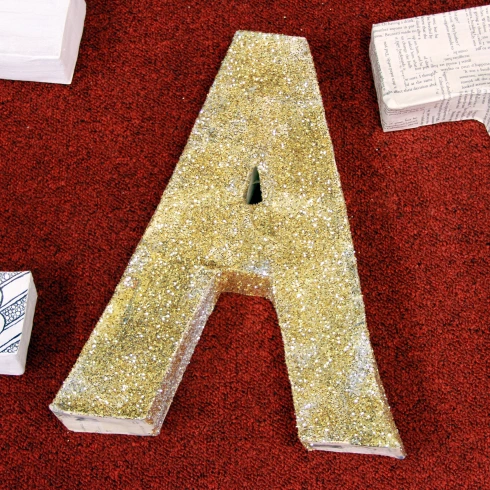
This one was glittered.

I used Mod Podge again with this one to cover it in book pages.

I wrapped the last letter in yarn. To do this I taped the yarn to the letter and started wrapping the entire letter horizontally first, then vertically until the letter was entirely covered.

And here they are in my art room!


Very fun!
Love it- esp. the gold one!
Fabulous!
Lovely …Follow me on Pinterest ive lots you’d like. TEREZA GOS VANGOS DESIGNZ
Love them. I have a question, how sturdy are they? Do they stand on there own?
Yes, they do stand on their own, but they’re otherwise somewhat fragile, in the sense that they couldn’t take much weight being placed on them. Paper mache is an awful lot of fun!
Brilliant idea and not too fiddly. Letters look really effective! Thank for sharing.