Archive | Arting, Sewing & Crafting RSS feed for this section

Blog on the Move!

12 Aug

A Sharper Focus Blog is now at: www.asharperfocusblog.com

That’s right, I’m moving! Last fall I took a web design class so that I could customize my blog more and expand my web capabilities. After a summer of working on the new blog, I’ve moved the blog from a wordpress.com site to a wordpress.org site and am ready for you to join me. Come on over and don’t forget to press the Follow button on the bottom right to stay connected!

DIY: A-Frame Tent

25 Jul

A Frame Tent

This past spring I decided I wanted to make a tent for my nephew’s birthday. After looking around the web a bit I decided on a simple A-Frame design. The frame was very easy to make.

AFrameTent1

I purchased two 1x2s that were each 8 feet long and I had them cut in half at the hardware store. Also, I purchased 3 dowel rods, 4 feet long and 1/2 inch wide. I then marked two spots on each 1×2, one about an inch one end, and another about 4 inches from the other end. I then got out my 1/2 inch drill bit and got to work!

AFrameTent2

For the covering I had an old navy twin sized sheet lying around and then I also purchased 3 yards of star fabric. I ended up cutting the sheet so that it was 3 yards long to match the fabric, and 50 inches wide. I then turned both fabrics so their right sides where facing each other and sewed them together on both long sides. Next, I turned it right side out, creating a long tube. Since the sheet was wider than the fabric, I ironed the tube so that there was an equal border of blue on both sides. I then folded the tube in half and sewed a pocket to slide the top dowel rod through. I put the tent together and then marked the bottom of each side to know where to sew the bottom dowel rod pockets. I just folded the seam over twice to make it look nice.

AFrameTent3

After I made the tent I realized that in grass or on carpet it was pretty stable, but on wood or tile it would just slide open and collapse. To remedy this I cut pieces of parachute cord the width I wanted the 1x2s to stay apart. I then burned the ends of the parachute cords so they wouldn’t fray and then added a dab of kraft glue to a finishing tack so they would stay.

I’m excited about how it turned out and my nephew seemed to like it too! It makes a cozy place to read a book.

May o’ My

18 Jul

Physically I’ve been back from our yearly family trip to Gulf Shores for almost a week now, mentally I really want to stay in vacation mode. It’s been hard to snap out of it and get some things done, like work on this blog, think about the up coming school year and so on… And, to make matters even harder, it’s been wonderfully rainy. All I want to do is read or think about craft projects. Is that so wrong?

greenbeans

Oh well. I have little less than a month left before I have to go back to work, so hopefully I can relax a bit and get some things checked off my to-do list. The month of May was busy with finishing up the school year, some fun photography sessions and the garden finally started to produce. We got a late start because of an abnormally cool spring, but the green beans seemed to love the cooler weather!

SpringArtShow

My kids did at great job at this year’s Spring ISD Spring Art Show. Four of the entries received the Judges Merit Award! I was so proud of all of their hard work. Above are a Matisse inspired fish bowl work done by a 2nd grader, an awesome neon tiger portrait by a 5th grader, a Jamming Giraffe by a 1st grader and winter birch trees by a third grader.

w_Img51

If you where checking in around May you probably saw some of the senior sessions I did. I also did some prom sessions and I got to document beautiful handmade quilts by a local Houston artist! If you want to see more prom photos check this post at A Sharper Focus Photography!

It was definitely a busy and fun month.

DIY Masking Tape Paintings

14 Feb

MaskingTape

Happy Valentine’s Day everyone! I hope you are having a great day spending time with your friends and loved ones. This past weekend I got to spend the afternoon being artsy with my nephew.

MaskingTape1

We gathered up some small canvases, masking tape and craft paint to create a fun Valentine’s gift for his parents, and a piece for himself.

MaskingTape2

We decided to practice first making a “C” for Corwin and an “I” for Ian. I cut the masking tape to piece together the letters and smoothed them to the canvases. I showed Corwin how to blend the different colors together to cover the canvas, and he had a great time creating new hues.

MaskingTape3

When they dried we had fun taking off the tape to reveal our creations. I then wrote “Love” with the tape and Corwin went about painting that canvas for his gift.

MaskingTape4

This was a fun and easy project for the both of us, and the possibilities with masking tape are endless. I hope get the chance to create something fun with someone you love this week!

DIY Tutorial – Paper Mache Animal Heads

3 Feb

Paper Mache Animal Head

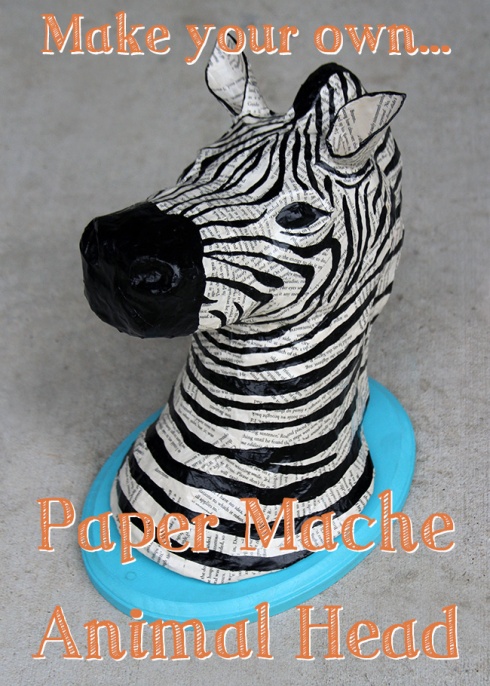
Specifically a zebra head! Meet Zebulon, Sean named him while I was woking on him one day and it stuck. This summer I had the idea of doing a mounted head as an art project and after searching the internet for a while I came upon Lil Blue Boo’s Blog (which is super great by the way!) and her Unicorn Paper Mache Animal Head Tutorial. I used her newspaper and masking paper construction method to build the basic shape of the head, and let me tell you, paper towel paper mache is the way to go!

zebra1

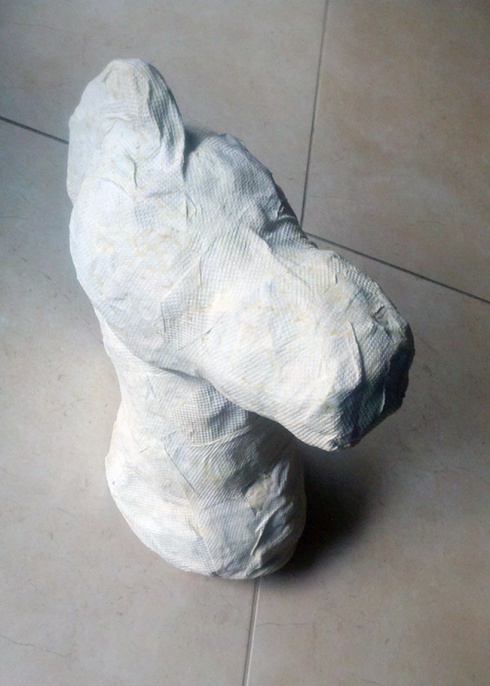
Here is my head after I had put the first layer of paper over the newspaper. I used a raw combination of flour and water for my glue. Just put a few spoon-fulls of flour into a bowl and start stirring in water a little at a time, making sure to fully incorporate the liquid before adding anymore. When you have a smooth liquid paste you’re ready to start. I looked at different recipes online and not only is this one easy and cheap, it also seems to be one of the strongest.

zebra2

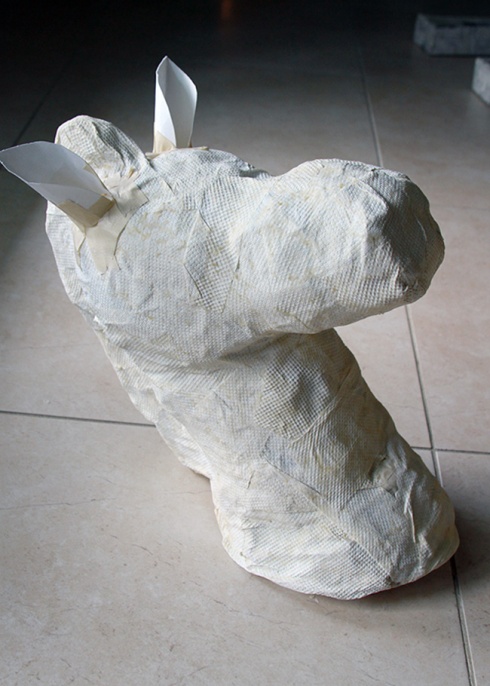
Here I have cutout cardboard ears and taped them on the head after the first layer has completely dried.

zebra3

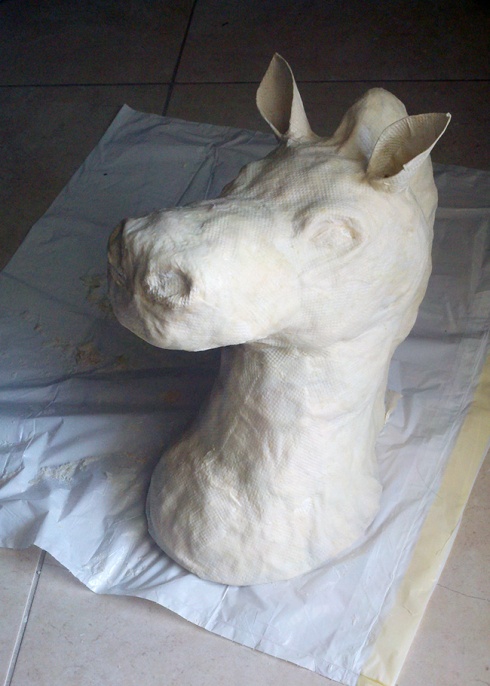
Now is the fun part. The paper towels are so easy to mold into the contours of the face. I added the brow ridges, the nostrils, covered the ears, and filled in any parts that were looking a little lumpy.

zebra5

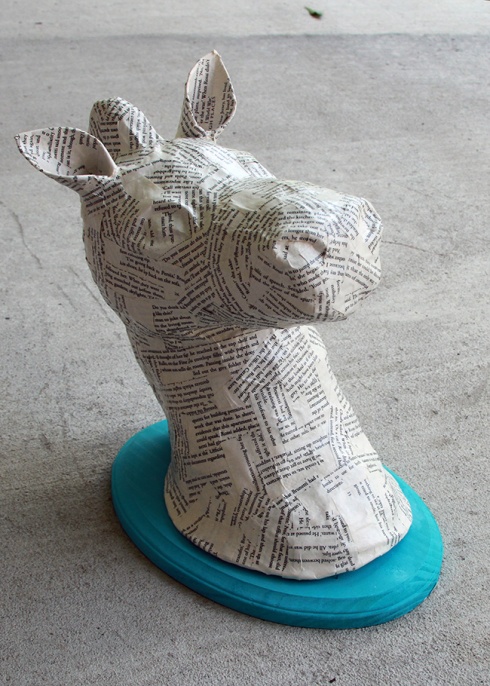
From here I used glue to attach the flat cardboard of the neck to a wooden plaque I had already painted, and I used finishing nails around the edge of the neck to make it even more secure. I then found an old book and stared cutting up the pages into small pieces and Mod Podged the book over the paper mache. This also covered up my nail holes.

zebra6

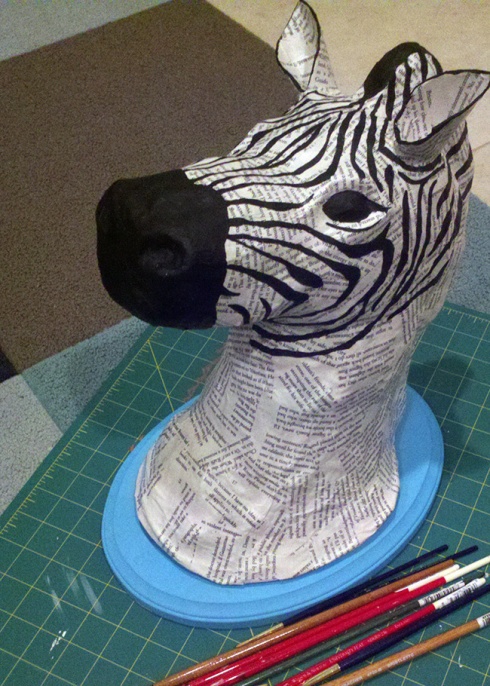
When all of that was dry, I used black acrylic paint to add details and stripes. Here he is in progress.

zebra7

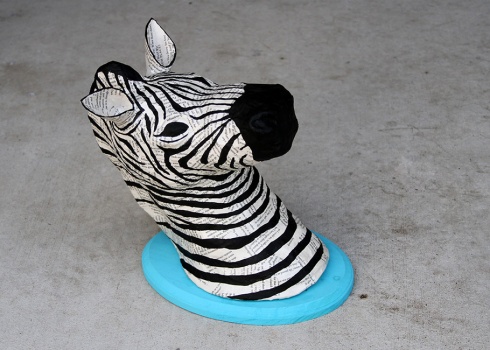
Here he is, stripes all done. I also decided to seal him with some clear Polycrylic.

zebra8

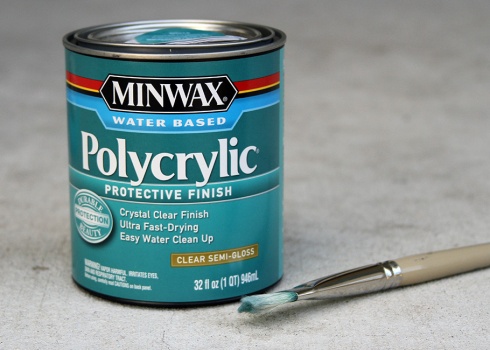
I chose the semi-gloss finish so he now has a little shine to him.

zebra9

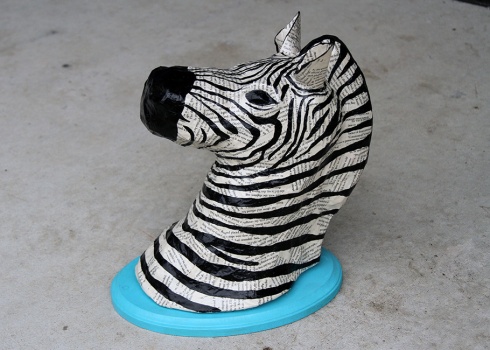
There he is, Zebulon the zebra! Now I just have to decide where I want to hang him up. Luckily he is very lightweight so hanging him should be easy.

I hope you have fun making an animal head of your own.